I bet you are all wondering what in the world this big announcement could be, right??? Well, I am so excited to share this news with y'all. This project has been in the works for many months now and we have eagerly awaited this day. I am partnering with two of my best bloggy friends, not to mention two completely inspiring women, to start a fabulous new blog called
the CSI project!!!
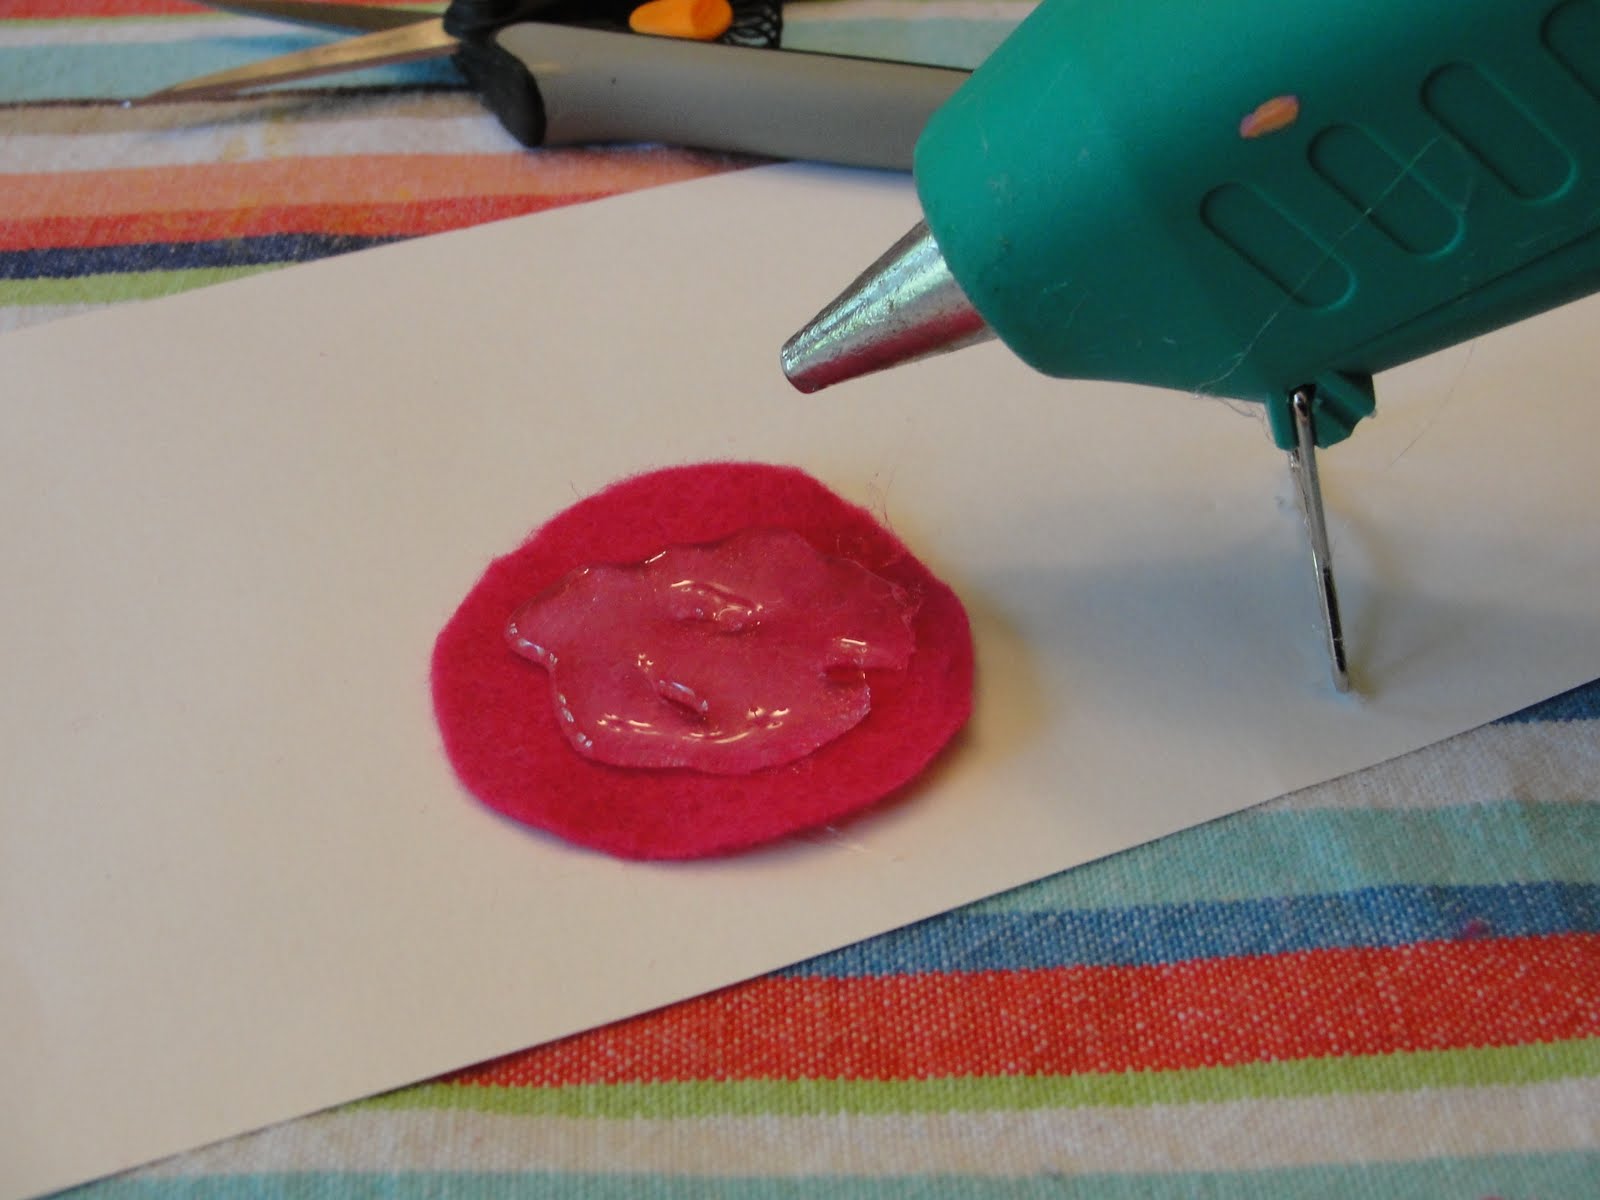
![]()
This exciting new adventure includes my besties ........ Jen from Tatertots and Jello , Beckie from Infarrantly Creative, and myself. It's a weekly craft challenge that's going to be so awesome and really fun -- a place where you can show off your ideas. And we want to feature YOU!
Come on over to the CSI project and check it out to learn all of the details!
It's going to be a blast ........
•There will be a really fun challenge each week
•There will be a beautiful giveaway each week that you can win
• And there will be a fabulous guest judge each week that will see your projects, and lots more!!

To celebrate the launch of our new site, Jen will be hosting a week of fabulous giveaways on her blog ..... Tatertots and Jello. See that little cutie up there with the gorgeous flower on her stinkin cute bald head? That is only part of today's giveaway package, and let me tell you...it is completely adorable...you must check it out!
Be sure and mark your calendars for the week of May 24th for our very first craft challenge link up at the CSI project! The theme for the week will be "paint". So ladies.....start thinking about all the fun things you can do with paint and get to getting!!! We'd also love to hear your thoughts on ideas for future themes you'd like to see. So hop on over and leave us a comment or two and come see what we're all about. I hope to see you all there the week of May 24th...it is going to be so much fun!